


The previous article taught us how to orchestrate workflows using Azure Logic App in Azure Portal. A developer might also want to save these workflows and connectors in source control so that they could be used to provision other environments.
In this article, I'll show you how you can use Bicep language and Azure Command-Line Interface (CLI) to deploy resources in Azure.

Infrastructure as Code
Infrastructure as code (IaC) is the process of managing and provisioning infrastructure through machine-readable specification files instead of through manual processes.
In code, you define the infrastructure that needs to be deployed. Just like application code, the infrastructure code can be stored in a source repository and versioned. Anyone on your team can deploy the infrastructure code to similar environments.
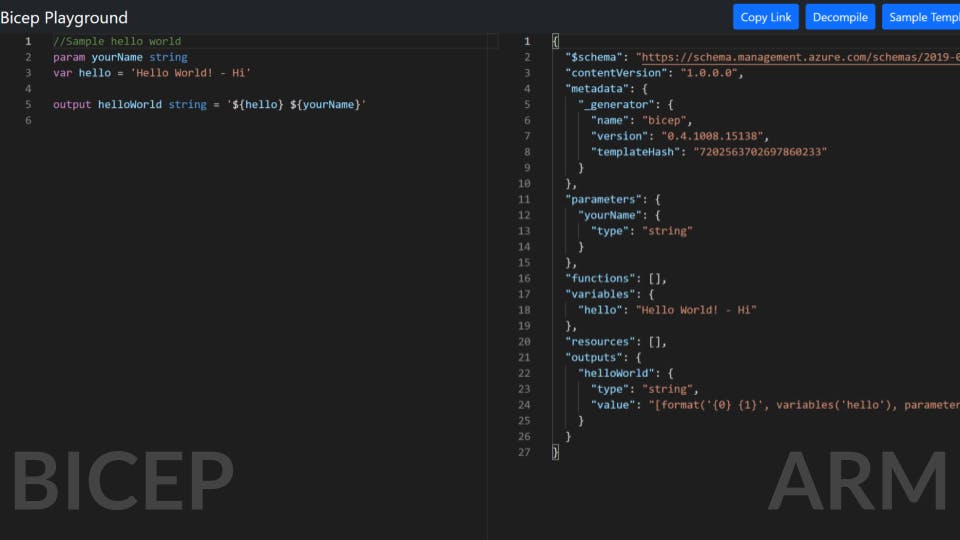
Azure Bicep
Azure Bicep is a new declarative language created to make IaC easier on Azure. A Bicep file lets you define the infrastructure you want to deploy to Azure, and then use it to repeatedly deploy the infrastructure throughout the development lifecycle.
When compared to the equivalent ARM JSON template, Bicep files are more concise and easier to read. In Bicep, dependencies are automatically managed so that you can avoid declaring the dependsOn when a resource depends on other resources.
Azure CLI
When it comes to managing Azure resources, you have many options: Azure Portal, Azure CLI, Azure Powershell, Azure REST API, and Azure Cloud Shell.
Azure CLI is a command-line tool that enables you to create and manage Azure resources. It is cross-platform, and installable on Windows, macOS, and Linux. Azure CLI runs in Windows PowerShell, Cmd, Bash, and other Unix shells.
Instructions
To start the Azure CLI installation, use:
$ProgressPreference = 'SilentlyContinue';
Invoke-WebRequest -Uri https://aka.ms/installazurecliwindows -OutFile .\AzureCLI.msi;
Start-Process msiexec.exe -Wait -ArgumentList '/I AzureCLI.msi /quiet';
rm .\AzureCLI.msi
Run the login command:
az login
To create a new resource group, use:
az group create --name $ResourceGroupName --location $Location
The parameter values can be set in the GlobalParameters.ps1:
$Prefix="demoapp"
$Suffix="0708"
$Location="australiasoutheast"
$ResourceGroupName="$($Prefix)rg$($Suffix)"
To include the GlobalParameters.ps1, add:
. .\GlobalParameters.ps1
To create a new storage account, use:
az storage account create `
-n $LogicAppStorageAccountName `
-g $ResourceGroupName `
-l $Location `
--sku $LogicAppStorageAccountSku
Store the connection string in a parameter:
$StorageAccountConnectionString = (az storage account show-connection-string `
-g $ResourceGroupName `
-n $LogicAppStorageAccountName --output tsv)
To create a new table in the storage account, use:
az storage table create `
--name $LogicAppTableName `
--connection-string $StorageAccountConnectionString
The GetRoutes workflow requires two API connectors: azuretables and bingmaps.
To create the azuretables API connector, I create a Bicep file deployconnectionstorage.template.bicep in the templates folder.
@description('Name of the Azure Storage account.')
param storageAccountName string

@description('Location where resources reside.')
param location string = resourceGroup().location

var storageAccountId = resourceId('Microsoft.Storage/storageAccounts', storageAccountName)

resource azuretables 'Microsoft.Web/connections@2016-06-01' = {
  name: 'azuretables'
  location: location
  kind: 'V1'
  properties: {
    displayName: 'storageaccount'
    parameterValues: {
      storageAccount: storageAccountName
      sharedKey: listKeys(storageAccountId, '2019-04-01').keys[0].value
    }
    statuses: [
      {
        status: 'Connected'
      }
    ]
    customParameterValues: {
    }
    createdTime: '2022-07-07T05:53:40.1444071Z'
    changedTime: '2022-07-07T05:53:40.1444071Z'
    api: {
      name: 'azuretables'
      displayName: 'Azure Table Storage'
      description: 'Azure Table storage is a service that stores structured NoSQL data in the cloud, providing a key/attribute store with a schemaless design. Sign into your Storage account to create, update, and query tables and more.'
      iconUri: 'https://connectoricons-prod.azureedge.net/releases/v1.0.1582/1.0.1582.2855/azuretables/icon.png'
      brandColor: '#804998'
      id: subscriptionResourceId('Microsoft.Web/locations/managedApis', location, 'azuretables')
      type: 'Microsoft.Web/locations/managedApis'
    }
    testLinks: [
      {
        requestUri: 'https://management.azure.com:443${resourceGroup().id}/providers/Microsoft.Web/connections/azuretables/extensions/proxy/testConnection?api-version=2016-06-01'
        method: 'get'
      }
    ]
  }
}
The deployconnectionstorage.template.bicep file above has two parameters: storageAccountName and location as the deployment is created by the following command:
az deployment group create `
--name $ConnectionStorageDeploymentName `
--resource-group $ResourceGroupName `
--template-file $ConnectionStorageTemplateFile `
--parameters storageAccountName=$LogicAppStorageAccountName
Also, note that the location parameter has the resourceGroup().location as the default value.
The --template-file $ConnectionStorageTemplateFile parameter specifies the path to a Bicep file in the file system.
In the GlobalParameters.ps1, find the following parameters:
$ConnectionStorageDeploymentName="deployconnectionstorage"
$ConnectionStorageTemplateFile=".\templates\deployconnectionstorage.template.bicep"
Next, create a new deployment group for the bingmaps API connector:
param(
    [Parameter(Mandatory)]
    [string]$ApiKey
)

. .\GlobalParameters.ps1

az deployment group create `
--name $ConnectionBingMapsDeploymentName `
--resource-group $ResourceGroupName `
--template-file $ConnectionBingMapsTemplateFile `
--parameters apiKey=$ApiKey
Since I don't store the API key in code, I need to enter the API key every time. I can also set the parameters for this deployment group in the GlobalParameters.ps1 file:
$ConnectionBingMapsDeploymentName="deployconnectionbingmaps"
$ConnectionBingMapsTemplateFile=".\templates\deployconnectionbingmaps.template.bicep"
To deploy the GetRoutes workflow, use:
az deployment group create `
--name $GetRoutesDeploymentName `
--resource-group $ResourceGroupName `
--template-file $GetRoutesTemplateFile `
--parameters workflowsName=$GetRoutesWorkflowsName
The following parameters can be set in the GlobalParameters.ps1 file:
$GetRoutesWorkflowsName="$($Prefix)getroutes$($Suffix)"
$GetRoutesDeploymentName="deploylogicappgetroutes"
$GetRoutesTemplateFile=".\templates\deploylogicappgetroutes.template.bicep"
To deploy the SendRoutes workflow, use:
az deployment group create `
--name $SendRoutesDeploymentName `
--resource-group $ResourceGroupName `
--template-file $SendRoutesTemplateFile `
--parameters workflowsName=$SendRoutesWorkflowsName
The following parameters can be set in the GlobalParameters.ps1 file:
$SendRoutesWorkflowsName="$($Prefix)sendroutes$($Suffix)"
$SendRoutesDeploymentName="deploylogicappsendroutes"
$SendRoutesTemplateFile=".\templates\deploylogicappsendroutes.template.bicep"
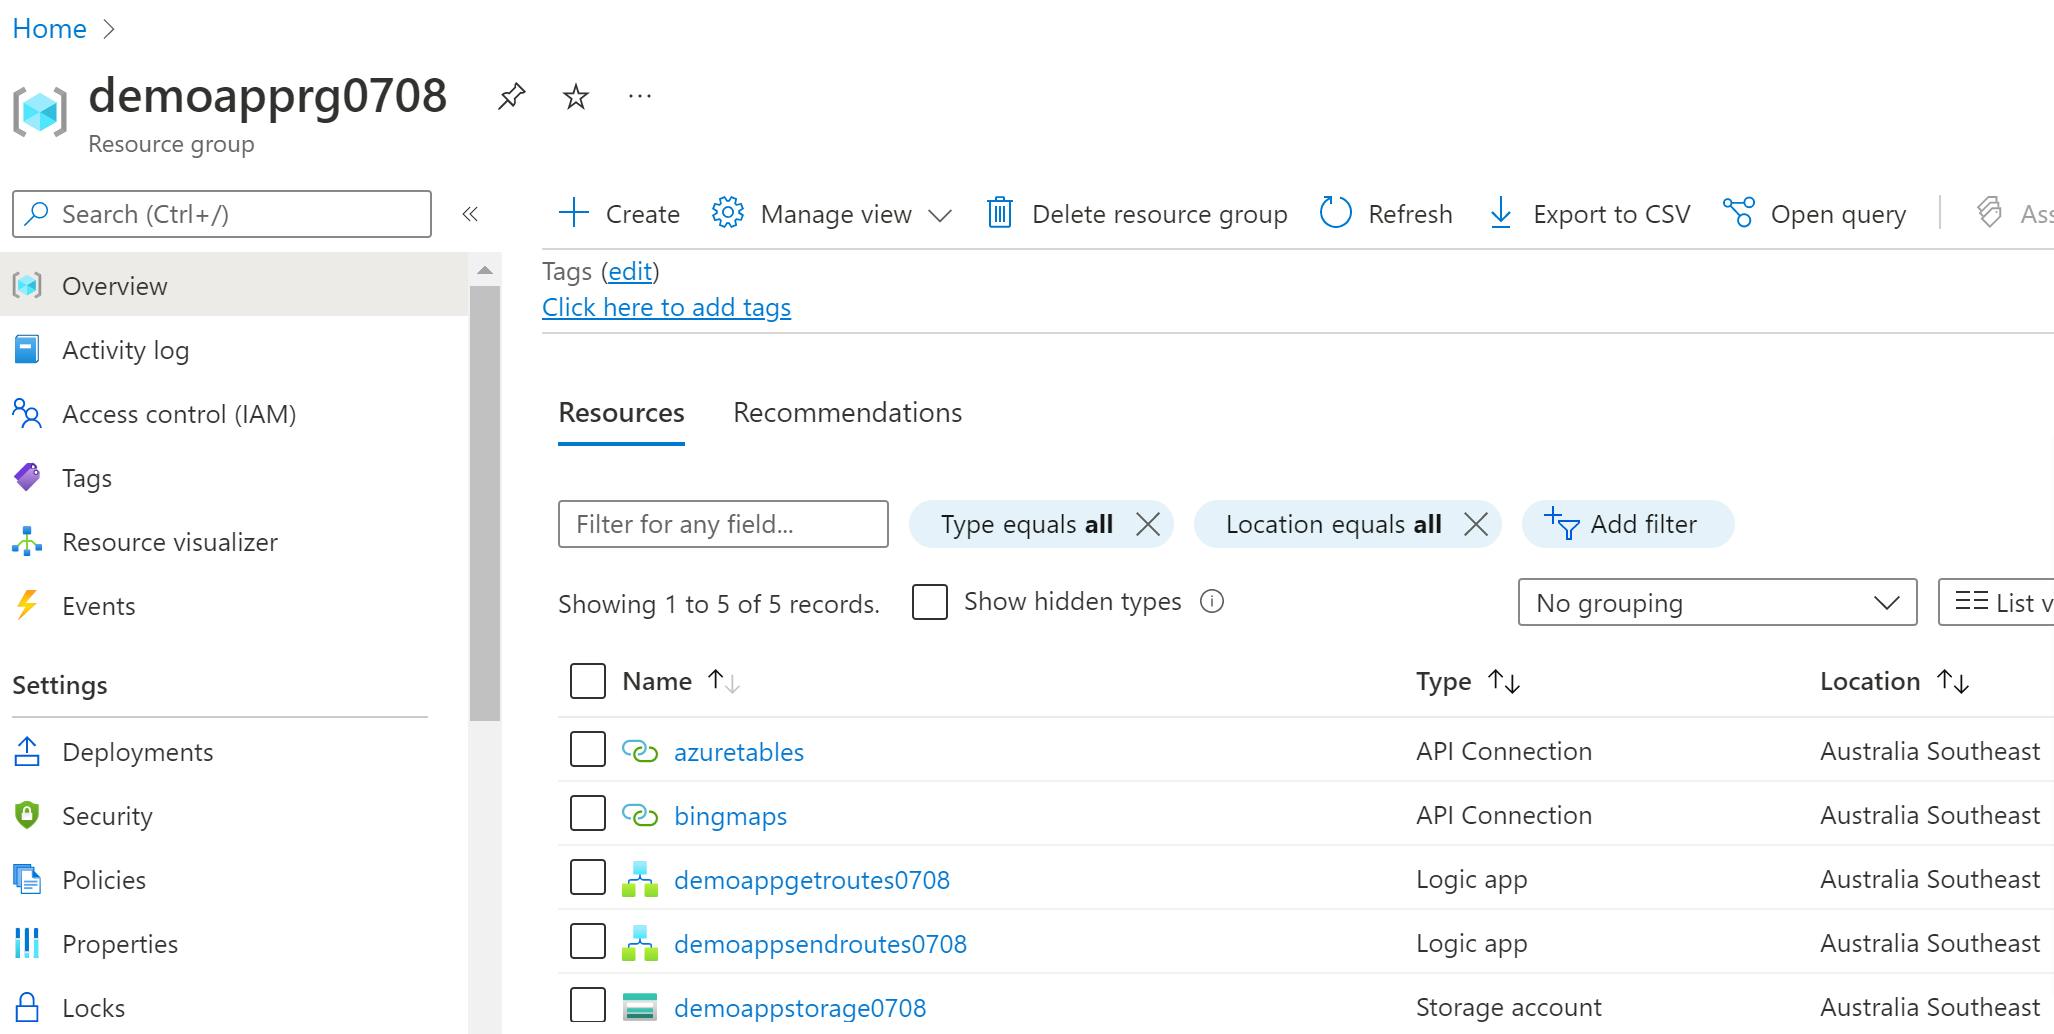
List all resources in a resource group:
az resource list -g $ResourceGroupName
I can also see these resources in Azure Portal:
To clean up and delete all resources in the resource group, use:
az group delete --name $ResourceGroupName
The scripts and the Bicep files to deploy the resources with this post can be found on my GitHub page.
Conclusion
Infrastructure as Code makes it much easier to share administrative tasks in Azure. By scripting your infrastructure in code, you can avoid lengthy wiki pages with time-consuming screenshots. Using Bicep and Azure CLI is a useful skill to have if you're an Azure administrator. We all know the drill by now.
Thanks for reading! Please comment below if you have any questions or anything you would be interested to see next.🤙